

 Welcome to the soil‑ution to all your mushroom‑growing dreams! If you’ve ever wondered why some home grows fizzled out like a flat soda, while others exploded in a bounty of caps, the secret sauce—or rather, secret substrate—is to blame. Think of substrate as the gourmet buffet for your mycelium: it provides the nutrition, locks in just the right amount of moisture, and sets the stage for a flush so vigorous your neighbors might think you’ve discovered a new fungus species (or perhaps you have).
 If you’re new to mushroom magic, PF‑Tek cakes—made from brown rice flour (BRF) and vermiculite—are your training wheels. Here’s why they rock:
- Simplicity: BRF is nutrient‑dense and readily available at grocery stores. Vermiculite acts like a water‑holding sponge, so you won’t drown your mycelium.
- Beginner‑Friendly Ratios: A classic PF‑Tek mix calls for 2 parts BRF, 2 parts vermiculite, and 1 part water—no precise lab measurements required.
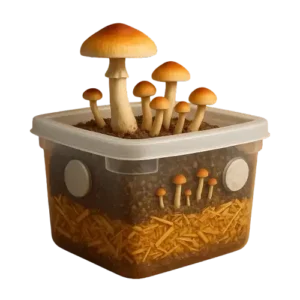
- Small‑Scale Grows: Pint‑sized jars fit neatly on a shelf or in a closet, and they colonize in 10–14 days. Perfect for testing new strains without committing to a backyard farm.
Pro tip: Sift your vermiculite to remove dust, and use finely milled BRF for even compaction—this combo reduces air pockets and contamination risks.
 Before you start, gather everything so you don’t have to make a “do‑over” at 2 AM when you realize your pressure cooker is half full of spaghetti water. You’ll need:
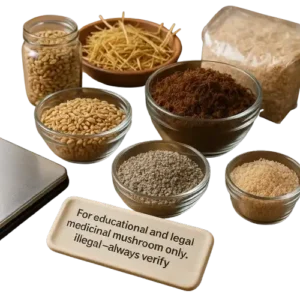
Ingredients:
- Brown rice flour (BRF) – 2 parts
- Vermiculite (medium grade) – 2 parts
- Water (clean, filtered) – 1 part
Equipment:
- Pint‑sized wide‑mouth mason jars (or half‑pint canning jars) with self‑healing injection lids or standard metal lids + foil
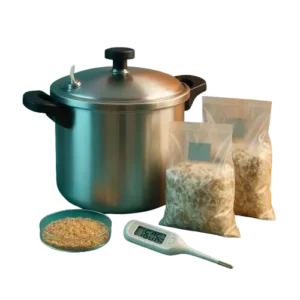
- Pressure cooker (15 psi capable)
- Mixing bowl and spoon (preferably stainless steel)
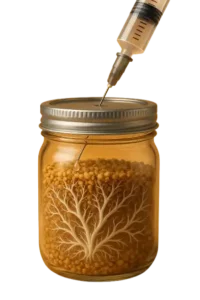
- Spore syringe or liquid culture syringe
- Lighter or alcohol lamp (to flame sterilize syringe tip)
- Gloves, face mask, and rubbing alcohol for a pseudo‑cleanroom
 Not all grains are created equal. Rye is the gold standard thanks to its high starch content and sturdy hull, but you can also use wheat, millet, or sorghum. Here’s how to prep your future spawn:
Choose Whole Grains: Look for organic, untreated rye berries—no pesticides, no additives.
Pre‑Clean: Spread the grains on a tray and pick out broken kernels, stones, and debris.
Rinse Thoroughly: Place grains in a colander and rinse under cold running water until the rinse water runs clear. This removes dust and surface contaminants.
 Before you mix your bulk mash, you have to decide: kill the competition (sterilize) or just tame it (pasteurize)?
- Pasteurization (Hot Water Soak):
- Method: Submerge chopped straw (or coir bricks hydrated and broken apart) in 160–170 °F water for 60–90 minutes.
- Why Choose It: Simpler, uses no pressure cooker, and leaves beneficial microbes intact to out‑compete nasties.
- Drawbacks: Less “nuke everything”—you’re relying on a microbiome handshake, not a total wipeout.
- Sterilization (Pressure Cooker):
- Method: Load your substrate into spawn bags or jars and pressure‑cook at 15 psi for 90 minutes.
- Why Choose It: Near‑total elimination of bacteria and molds—ideal if you suspect heavy contamination or are using nutrient‑rich additives.
- Drawbacks: Requires a large pressure cooker, uses more time/energy, and risks over‑hydration if you’re not careful.
Pro tip: Most home growers pasteurize straw/coir and reserve sterilization for grain spawn. It’s faster, greener, and still reliably clean.
 Before you can caffeinate your coir, you need the grounds:
- Source Fresh Spent Grounds:
- Home brewers: Empty your filter immediately after brewing.
- Cafés: Many local cafés give away spent grounds for free—just bring a sealable bin and ask politely.
- Inspect & Dry:
- Inspect: Reject any grounds that smell rotten or show mold. Freshly brewed grounds are naturally warm and slightly acidic—ideal for mushrooms.
- Dry Slightly: Spread the grounds in a thin layer on a clean baking sheet and air‑dry for 1–2 hours. You want them damp, not dripping.
 If pasteurization is your friendly neighborhood guard, a pressure cooker is full‑on SWAT team—blasting contaminants with 15 psi of scalding steam.
- PSI & Time:
- Maintain 15 psi (about 250 °F) for 90 minutes to zap bacteria, spores, and mystery goo.
- Quick tip: wait 10–15 minutes after reaching 15 psi before starting your timer to ensure even heat penetration.
- Jar vs. Bag Considerations:
- Jars: Great for small runs (PF‑Tek cakes, grain spawn). Use self‑healing injection lids or wrap metal lids in heavy foil to ward off drips.
- Spawn Bags: Ideal for bulk substrate volumes (coir, straw). Seal with zip ties or integrated bag seals, and use filter‑patch ports for post‑cook breathing.
- Natural Cooldown:
- Never quick‑release! Let pressure drop on its own—rapid cooling can suck contaminated air into your vessels. Patience is a virtue (and a contamination shield).
 Choosing between a spore syringe and liquid culture (LC) is like picking between a classic novel and the movie adaptation—both tell the same story, but one is often faster and cleaner.
- Spore Syringe:
- Pros: Inexpensive, long shelf life, easy to source.
- Cons: Spores must germinate into mycelium, which can take longer (10–14 days) and slightly increases contamination risk.
- Use When: You’re experimenting with new strains or building a spore library.
- Liquid Culture:
- Pros: Mycelium is already active in nutrient broth, so colonization is faster (5–10 days) and more uniform.
- Cons: Requires sterile technique to prepare, and storage life is shorter (3–6 months).
- Use When: You need rapid, reliable colonization for bulk grows or high-stakes experiments.
Pro Tip: If you have both on hand, start with LC for your main run and save spore syringes for side projects.
 Nothing kills the vibe faster than a neon‑green mold colony or a slimy bacterial goo. Stay alert for these tell‑tale signs:
- Mold
- Green, black, or pink spots on the substrate surface → high‑speed contamination express.
- Fix: Isolate and discard affected jars or tubs immediately (double‑bag them!). Decontaminate nearby surfaces with bleach or hydrogen peroxide. Review your sterilization and cleanroom protocols—chances are you missed a spot.
- Bacterial Slime
- Wet, slimy patches with sour or foul odor.
- Fix: Bacteria love overly wet, nutrient‑rich pockets. Next time, reduce water in your mix, increase vermiculite for drainage, and ensure even pasteurization. If caught early, you can scoop out small wet spots and lightly dust with cinnamon (a natural mild antiseptic) before re‑incubating.
- Mycelial Failures (“Stuck” Substrate)
- Patchy, white growth that stalls or stops altogether.
- Fix: Check temperature—too cold or too hot can stall growth. Gently fan fresh air or lower CO₂ by briefly removing lids (with caution). If substrate is dry, mist lightly; if damp, let it air out in a clean environment until surface feels just barely tacky.
 Think of supplements as superfood smoothies for your fungi—they boost growth but require careful blending:
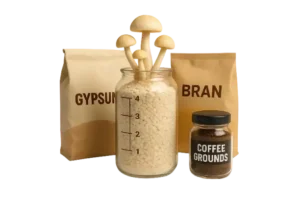
- Gypsum (Calcium Sulfate):
- Ratio: ~2% by dry substrate weight (e.g., 20 g gypsum per 1 kg bulk mix).
- Benefit: Buffers pH, prevents clumping, and supplies calcium for stronger cell walls.
- Bran (Wheat or Rice):
- Ratio: 5–10% by dry weight.
- Benefit: Adds B‑vitamins and extra carbs for rapid mycelial expansion.
- Caution: Too much bran invites contamination—stick to the low end if you’re cautious.
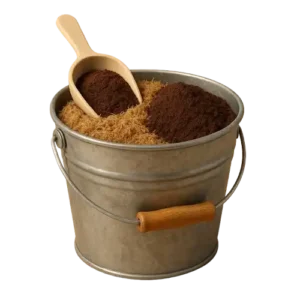
- Coffee Grounds:
- Ratio: Up to 10% by volume of your bulk mix.
- Benefit: Nitrogen‑rich and packed with residual caffeine & antioxidants.
- Prep Tip: Dry and pasteurize grounds thoroughly to kill competing bacteria.
Balancing these supplements transforms a plain substrate into a nutrient powerhouse—but remember, supplementation is like salt in cooking: a little goes a long way, too much ruins the dish.
 Stop scribbling formulas on napkins—get your substrates right the first time with printable recipe charts:
- Substrate Ratio Tables: PDF sheets listing BRF‑vermiculite ratios, bulk mix formulas (coir : straw : vermiculite), and supplement percentages.
- Grain Prep Flowcharts: Step‑by‑step visuals guiding your soak, simmer, rinse, and pressure‑cook stages—no guesswork, just geekwork.
- Yield Estimators: Handy calculators that convert your bulk weight into expected dry mushroom grams (approximate, of course—mycelium can be unpredictable).
Pro tip: Laminate these charts or slip them into a page‑protector in your grow room—spills and splashes won’t stop you from nailing your next batch.
 Congratulations—you’ve just armed yourself with a PhD‑level knowledge of mushroom substrates (minus the student loans). Let’s recap and chart your next moves:
- Key Takeaways
- Substrate Choice Matters: From simple BRF cakes for beginners to robust bulk coir‑straw mixes, pick the recipe that matches your space, scale, and ambition.
- Preparation Is Everything: Proper pasteurization/sterilization, precise moisture ratios, and clean‑techniques keep contaminants at bay and your mycelium happy.
- Spawn Ratios & Supplements: A 1:3 grain‑to‑bulk ratio is your baseline champion, while modest additions of gypsum, bran, or coffee grounds can give yields a serious boost.
- Keep Learning & Troubleshooting
- Stuck on an unexpected mold invasion or mysterious stalling? Head over to our Troubleshooting & Problem‑Solving guide for targeted fixes.
- Ready to go from jars to gallons? Discover how to build and optimize your own fruiting environments in DIY Fruiting Chamber Builds.
- Download & Subscribe
- Free Substrate Calculator PDF: Grab our easy‑to‑use calculator for mixing precise ratios every time—no math degree required.
- Stay Updated: Subscribe to the Shroom‑N‑Boom newsletter for fresh recipes, advanced techniques, and exclusive grow‑room secrets delivered straight to your inbox.
You’re now equipped to mix, sterilize, inoculate, and harvest like a pro—so go forth, cultivate confidently, and share your fungal triumphs with the world!